Thursday, 10 January 2013

Workshop Activity. Work Bench and Knives.


Here is one of the work benches I make, ready for collection tomorrow. The design has been refined over the years but the last few I've made have all been the same, except for the length. That's a good sign, it means I can't think how to make them any better. See picture at the bottom of this post for an assembled bench.


I like using a wooden screw for the leg vice, it's more work and cost than a simple metal screw but it has a much nicer feel and is less sloppy. I turn the 2 1/2" screw threads using a massive threading tool, it cost me £1,000 from Dieter Schmid in Germany.


I needed to make a left handed knife as part of a nice order for a customer in Northern Ireland, so I made a small batch to make it worth while. I posted the order yesterday in the normal first class post and it arrived today, how do they do that overseas so quickly and cheaply, I think our postal service is very under rated.
I am running low on snake wood and I can't get any more of good enough quality, so I may be replacing my premium knife stock with curly madrone, see the knife at the bottom. It didn't look much until I hit it with a finish and then wow!
You can see from this picture differences between the handles in length and ball size, they came from three different batches and just go to show it's all hand made!


I bought up the last of the Kingwood stocks at Yandles for my mini smoothers as well as some Brazilian Tulipwood which is also running very low. David can't get any more of either wood from any of his suppliers, so I may have to look at alternative woods. I bought the blanks below which were labelled 'wild olive', I don't whether that referred to the grain or the source of the wood. I chose blanks with the grain running roughly vertical and not too wild! I have learnt to treat olive wood with respect, it dries very slowly and has a tendency to check, so these blanks will be put into store for a year at least.It's a very beautiful timber and should make lovely little mini smoothers

Add caption

Tuesday, 8 January 2013

Customer Projects.


Richard has started a tool chest in cherry and is seen here cutting the dovetails with one of my magnetic guides. His Blog is well worth taking a look http://richard-wile.blogspot.co.uk/


The carcass assembled and below with the first coat of finish which really pops the grain.


I really like the use of the sap which is often discarded. The carcass is made from one long board so the grain is continuous.


I previously blogged on the cabinets above by Keith. Below is a bed to match!


The tops to the legs are African Blackwood which was finished on a buffing wheel using the oil in the wood to provide a lustrous shine.


Sunday, 6 January 2013

Krenov Style Cabinet Finished!


Knife hinges get a bad press for being fiddly to fit, but if you work carefully they are no more difficult than any other hinge. Here is my method, I use a spacer to set the offset on both the cabinet and the door and I control the protrusion with a drill bit half the size of the hole. I don't make any allowance for the gap between carcass and door, if it binds a little I just trim the door where it touches.
This is a 1/4" wide knife hinge from Sanderson Hardware in California and it's beautifully made. Their hinges are smaller than the smallest ones Brusso make and ideal for petite cabinets like this one.


Here is the result. I always fit the door when I glue up the carcass and then adjust the carcass to make sure I have even reveals.


Here is the finished cabinet, it's 20" high x 8" wide x 5" deep.


I tiny finger scallop to open the door, which is held with tiny 3 mm magnets.


Wonderful grain!


The shelves were curved to match the curve of the door and were supported by 1/8" brass pins.


The cabinet interior.


The back was treated with the same respect as the rest of the cabinet. The solid panel of rippled ash was left to float in it's frame which was screwed neatly in place.
At 33 hours, it took longer to make than I had anticipated but I was pleased with the result.


Thursday, 3 January 2013

Brian Boggs Chair


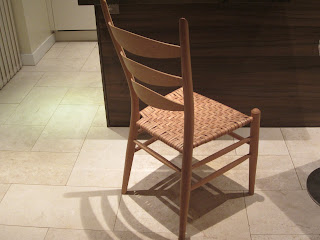
In 2008 Brian Boggs came to the UK to teach a chair making course at West Dean College. I didn't attend but wish I had. At the end of the course the chair he made was sold in a blind auction and I was lucky enough to win it.


It is one of the most comfortable chairs I have ever sat in.


There are curves all round and it's the result of one very skilled man dedicating himself to building a specific style of chair for many years. All of the parts are left straight from the tool (draw knife and spoke shave) which is not immediately obvious until you run your fingers over the surfaces.


The pegs are tented using a chisel bevel side down and add a nice little touch.


The top of the legs are skilfully rounded, again by hand and the seat is woven with bark.
I think he normally oils his chairs but this was left unfinished and in my view all the better for it.
The underneath of the chair is signed and dated.


Monday, 31 December 2012

Krenov Style Wall Cabinet


Well here it is the last post of my first year Blogging. It's been hard work but the feedback and interest has grown well and I've just passed 10,000 post views in the last month, so lots more for the New Year.
My latest project (when I could sneak some time in the workshop) is a Krenov inspired wall cabinet. I'm making the door from some wonderfully figured ash acquired from the Barnsley workshop a few years ago.


The door was to be curved which could be achieved in a few ways. Krenov typically coopered his curved doors but this works best for quarter sawn stock where the joins blend in with the vertical grain direction and would not have been suitable for this board. I seriously considered laminating the door from 2-3 mm strips cut on the band saw and gluing them on a former in the vacuum press. If I had intended making more similarly curved doors I would have gone this route, but as it was I decided to shape the door from a solid piece. The shot above shows the inside of the door with most of the waste removed on the table saw, making minute height adjustments to the blade on each cut.


I removed some of the waste on the outside of the door on the surface planer (jointer) but didn't go too far as by now the wood was getting thinner and there was a risk of serious damage. From that point it was over to hand planing using a curved sole plane for the inside and a flat smoother for the outside working down to the curved lines drawn on each end of the board.


Here is the result after scraping and initial sanding. I had considered leaving the door straight from the plane, Krenov style, but there was too much tearout on the swirling grain.


The carcass is from quarter sawn olive ash, the same board as my recently completed tool cabinet. Here I am dovetailing the sides with the boards taped together for speed. I'm still very pleased with my Bench Crafted Moxon vice, it's great for dovetailing.
Here is the carcass with the dovetails dry fitted, something I don't like doing as I normally make them a tight fit which only goes together once. After the hinges are marked and the curve traced on the top and bottom it needs to come apart for the work to be finished. I must also remember to rout out the groove for the back panel and interior fitments before reassembly.
Anyway that will happen in the New Year, so it just leaves me to wish all of you the very best for the New Year and happy woodworking!

Saturday, 29 December 2012

Winner in Show!


No, unfortunately not me! This fine blanket chest won the apprentice category in the Texas furniture show.


The dovetails were cut using one of my magnetic guides. I certainly wouldn't have wanted to attempt cutting this many dovetails, in wood this thick, totally free hand.


The execution is very crisp, well done John!


Thursday, 27 December 2012

Chisel Box, Andaman Padouk


I bought this set of Tasai chisels a little while ago and it's about time I made them a box.
The sides are laid out and marked with coloured dots, a very useful habit.


The chisels have a lovely balance and feel.


I'm cutting the dovetails for the box with a small hand made dovetail saw by Mitsukawa.
It's nice to cut dovetails without my magnetic guide once in a while just to show I still can!


The Andaman padouk has a wonderful orangey red colour.


James Krenov wrote that cutting dovetails in this hard brittle timber required extra care, and he was right! The fit had to push together by hand, if it needed a hammer it would split.


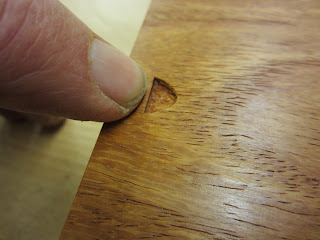
This is the little finger pull, carving is not my strong point so I kept it small.


The chisel housings were custom fitted on the table saw.
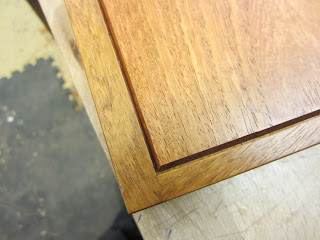
The even reveal was achieved on the router using my favourite Becksvoort router bit.