Friday 30 March 2012

Planes finished

I've been diverted to other little jobs, but the planes are finally complete. The smoothers may only be 1" shorter than my 9" model but they feel a lot more compact. Yes I know the jack plane at the back has no blade, I'm waiting for them to come in from Ron Hock.


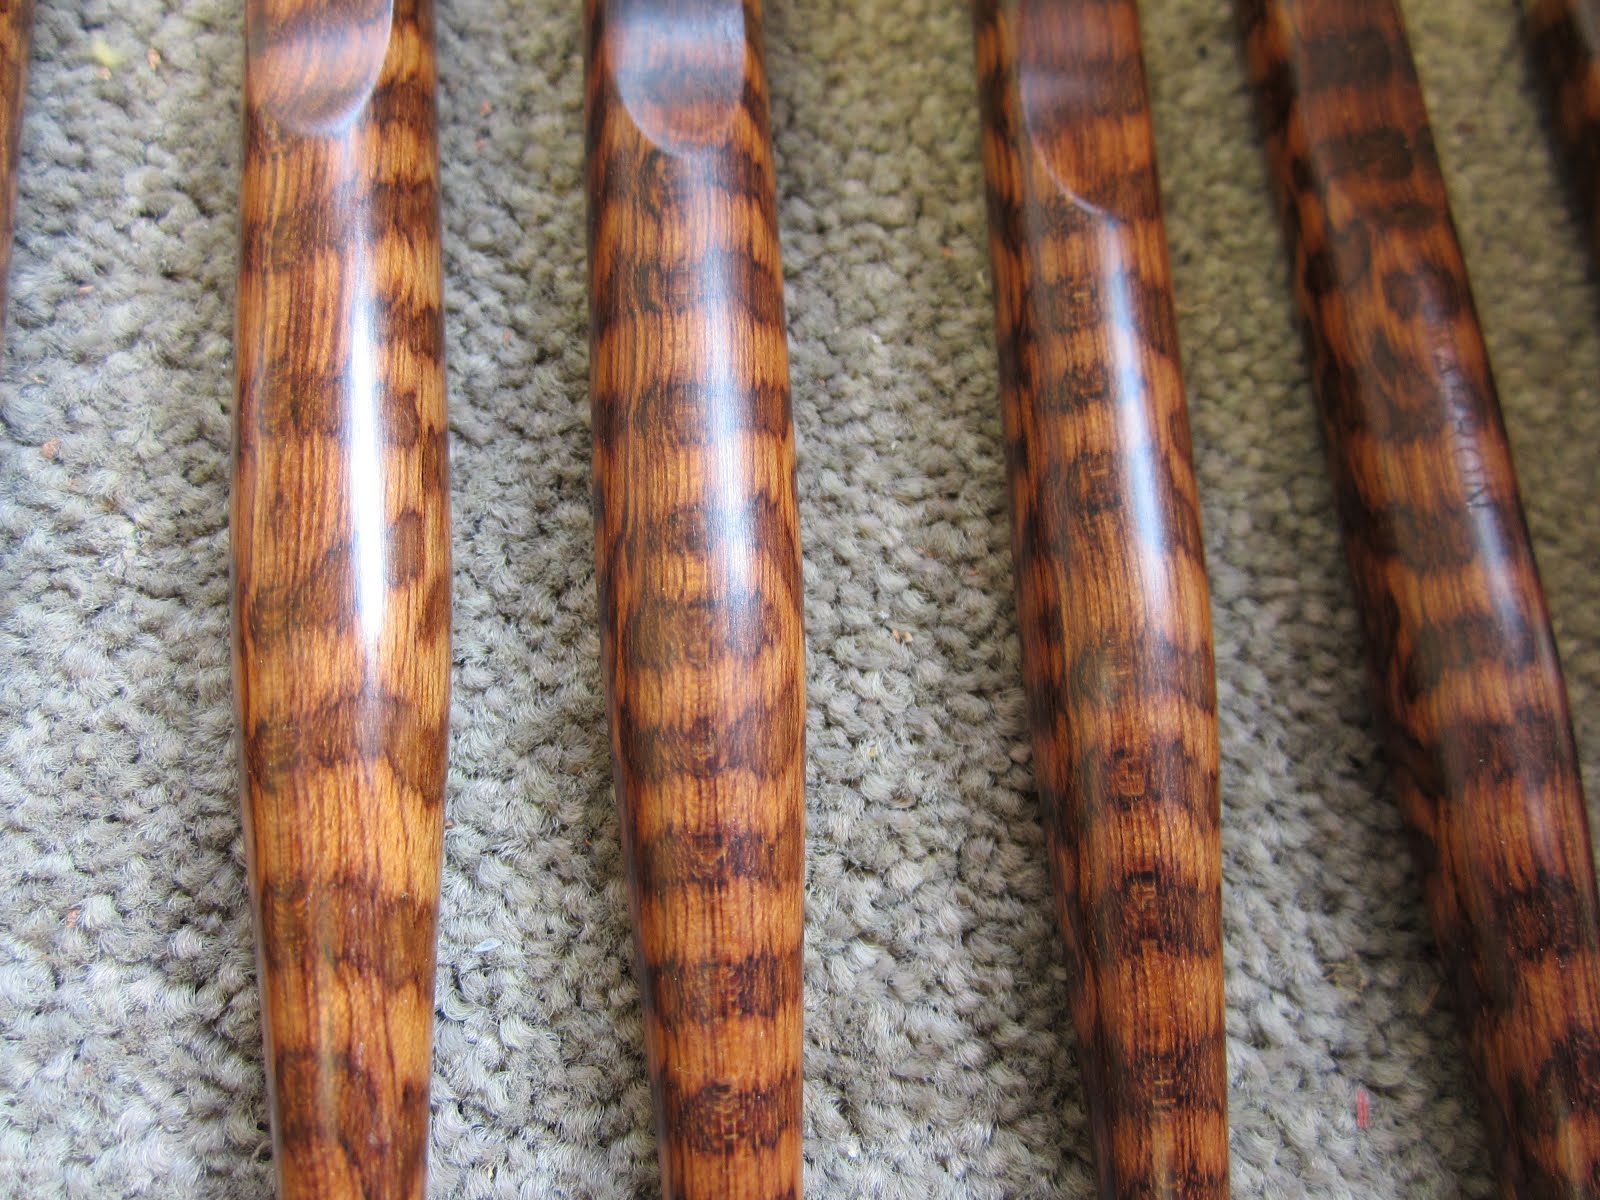
The rose bubinga has really nice colour, this was the last of the stock bought from Bob at Timberline, he told me the wood was nice, and he was right.


Here's the jack plane, I can't believe I've not made this size before. It's just under 14" and looks good, feels good and is very versatile.


My wife says this looks like a 1930's American car.


Thursday 29 March 2012

Tool orders

I have been sending tools out on a near daily basis since launching my Blog and videos. The shot above shows an order ready to go to the US, a jointer plane, a high angle smoother, a spokeshave, a scraper shave, a dovetail guide, a chisel hammer and a video. Keep 'em coming!


Before sanding the base smooth on my jack plane I'm levelling the base with a high angle smoother. If I don't do this, biases can be introduced resulting in a slightly skewed mouth, not good!


Here are the two jack planes after shaping on the band saw. I enjoy this part the most as the rough shape is achieved quickly and efficiently.


Saturday 24 March 2012

Jack Planes and Smoothers

I've just started a small batch of 2 jack planes and 3 smoothers. The jack planes are 13 1/2" long and a good general purpose size, this is a new plane to my range. The smoothers are 8" long and have a 1 1/2" Hock blade, this is the size favoured by James Krenov. I use a perspex template to mark out the shape and the position of the cross pin hole.


I prefer to drill the holes for the cross pin before separating the sides.


I set the drill press so that the spur just breaks through to the other side. I then turn the blank over and complete the hole from the other side.


A perfect hole with no breakout.


I also like to create the chamfers on the drill press. This conical bit from lee Valley gives excellent results.


Here are the sides separated on the band saw. I use a Lennox Trimaster carbide tipped blade and it gives a very smooth cut requiring the minimum of clear up.


Cleaning off the band saw marks with a Stanley No81 scraper fitted with a Hock blade, an awesome combination!


The centre section has the bed angles marked on ready for cutting on the band saw. These good quality bevel gauges from Chris Vesper hold their setting perfectly, avoiding costly mistakes.


Routing the groove for the screw head to ride in, using a template and a guide bush.


Gluing up the jack planes, you can never have too many clamps!!


Thursday 22 March 2012

Dovetail marking knives complete

This small batch is now complete. Rather than use the buffing wheel to finish I used three coats of melamine laquer which was rubbed out with micromesh to 3,600 grit. After applying wax this left a lusterous and flawless finish with good clarity. It took longer but was worth it.


Each knife comes boxed with a full set of instructions for sharpening etc.


Here are some in Brazilian Tulipwood a very hard and pretty timber with salmon pink stripes running through the cream wood.

Monday 19 March 2012

Norris plane restoration

Here is a Norris A6 I bought. It was in a sorry state with three separate cracks in the rear handle. The picture above shows it after being glued up with epoxy resin, all the excess glue and irregularities need sanding smooth. I worked from 240 grit through to 600 grit.
This was followed by 5 thin coats of shellac applied with a cloth then left to harden for a few days. This surafce was then worked with 400 grit until matt all over and then worked all the way through to 4,000 grit micromesh. The last coat was with a carnauba wax to give a nice protective sheen. The rosewood was a nice surprise and this was a pleasing restoration.

My aim was to leave the wood as natual looking as possible, I didn't sand too hard leaving as many of the old bumps and knocks as I could. The rubbing out removed all of the telltale cloth marks and left the surface matt so that the application of wax only raised a sheen and not a high gloss finish.


Snakewood marking knives

I've had a bit of a run on my snakewood marking knives so it's time to restock. Here is a small log costing £100 cut into two.

Here is the inside which shows how wasteful this fine wood can be, the snake pattern only goes about half way in and the centre has decayed.


Here are 26 usable blanks which makes them about £4 each. Wood doesn't come much rarer or expensive than this! These blanks will be taken to Jim my turner friend, he is too fast and too good for me to think about turning these myself.


This is the last of the stock turned about 6 months ago. The ferules are simply brass tube cut on my small band saw and the blades are heavy duty Swann Morton which I have shortened.


The blade slot is cut carefully by hand using and old dovetail saw which I sharpened. It has a kerf of .6mm which matches the blade width nicely.
Notice the way my index finger is curled into a notch on the handle rather than pointing down the blade. I find this easier to control the saw and it prevents you from applying too much pressure which can cause the line to wander. I have noticed on some of the high end current day saws that the makers have cut this notch but left it far too small to actually be used as it was intended, which is a shame.


The maker is stamped Hill late Howell on the steel back. Two names were often used for a period after a maker took over anothers business, usually after he had died, hence the use of the word 'late'. From memeory this dates this saw to the 1850's, I like old tools and it's nice to put them back in service.


Saturday 17 March 2012

New DVD out now!

At last my new DVD Hand Applied Finishing is available. It comprehensively covers the vital aspect of surface preparations and includes tips on the usage of planes, scrapers, machinery and sandpaper. The second parts looks at at variety of hand applied finishes including shellac, oil, varnish, acrylics and wax and methods of application. Also covered is advice on matching finishes to certain woods and how and when to combine finishes. You will also learn how and why to mix your own shellac.
It does not include anything on sprayed or coloured finishes and I make no apology for that.
The DVD costs £19.95 inc postage to Europe and has been produced in HD and the PAL format for very best picture quality. Unfortunately PAL will not play in DVD players in the USA unless you have a multi channel machine.

My dovetail alignment boards are complete after three coats of Osmo Hardwax oil (matt). The fences have been attached with screws which allows them to be removed if tuning of the board is ever necessary in the future.


Thursday 15 March 2012

New You Tube Videos

You may have noticed from my video bar that I now have more than one video. The editor really pulled his finger out this time and all 10 films have now been posted.

Tuesday 13 March 2012

Dovetail alignment boards

Yesterday I made some dovetail alignment boards to take to the Yandles show in April. They are made from quatersawn mahogany for its stability and reasonable price. If you want to see the board in action please see my video on You Tube, 'Hand cut dovetails made easy'.


The board above has been made using houndstooth dovetails which is not normal because of the extra time it takes, but it was the one made for a forthcoming You Tube video. The one below is the normal version with standard through dovetails.


Saturday 10 March 2012

You tube filming

Here are the two cameramen finishing off the cake sandwiches and tea, at the same time as trying to convince me that all the hard work happens on their side of the lens!!!


This is me edge jointing on the long shooting board. We managed 10 films in the day. The connection between my brain and mouth was severed on the 11th and we had to give up!
Look out for the films on You Tube in the coming 2 -3 weeks.


Friday 9 March 2012

You Tube videos

The cameramen are coming to my workshop again tomorrow and we are hoping to film 10 or 12 short films for You Tube. My first film posted last month, has proved a great success both in viewings and sales of tools which have been posted all round the world.

Here are some shots of some of the props I've been preparing and using for rehersals. I'm going to get to bed early, its going to be a long day tomorrow!


Monday 5 March 2012

Dansel Gallery

Yesterday I took some more stock of both furniture and tools to the Dansel Gallery in Abbotsbury, Dorset. It is a very picturesque village with the freehold for every building owned by one woman who makes sure everything new and old is kept in the same style. It is also home to the largest swanery in europe and half a mile from a glorious unspoilt sandy beach. All in all well worth a visit!

Heres a shot of the outside of the gallery which has been going for more than 20 years and is exclusively for hand made wooden products, very unusual.


Here is one of the pieces I took down, an oak chest with book matched spalted beech panels.