Monday 31 December 2012

Krenov Style Wall Cabinet


Well here it is the last post of my first year Blogging. It's been hard work but the feedback and interest has grown well and I've just passed 10,000 post views in the last month, so lots more for the New Year.
My latest project (when I could sneak some time in the workshop) is a Krenov inspired wall cabinet. I'm making the door from some wonderfully figured ash acquired from the Barnsley workshop a few years ago.


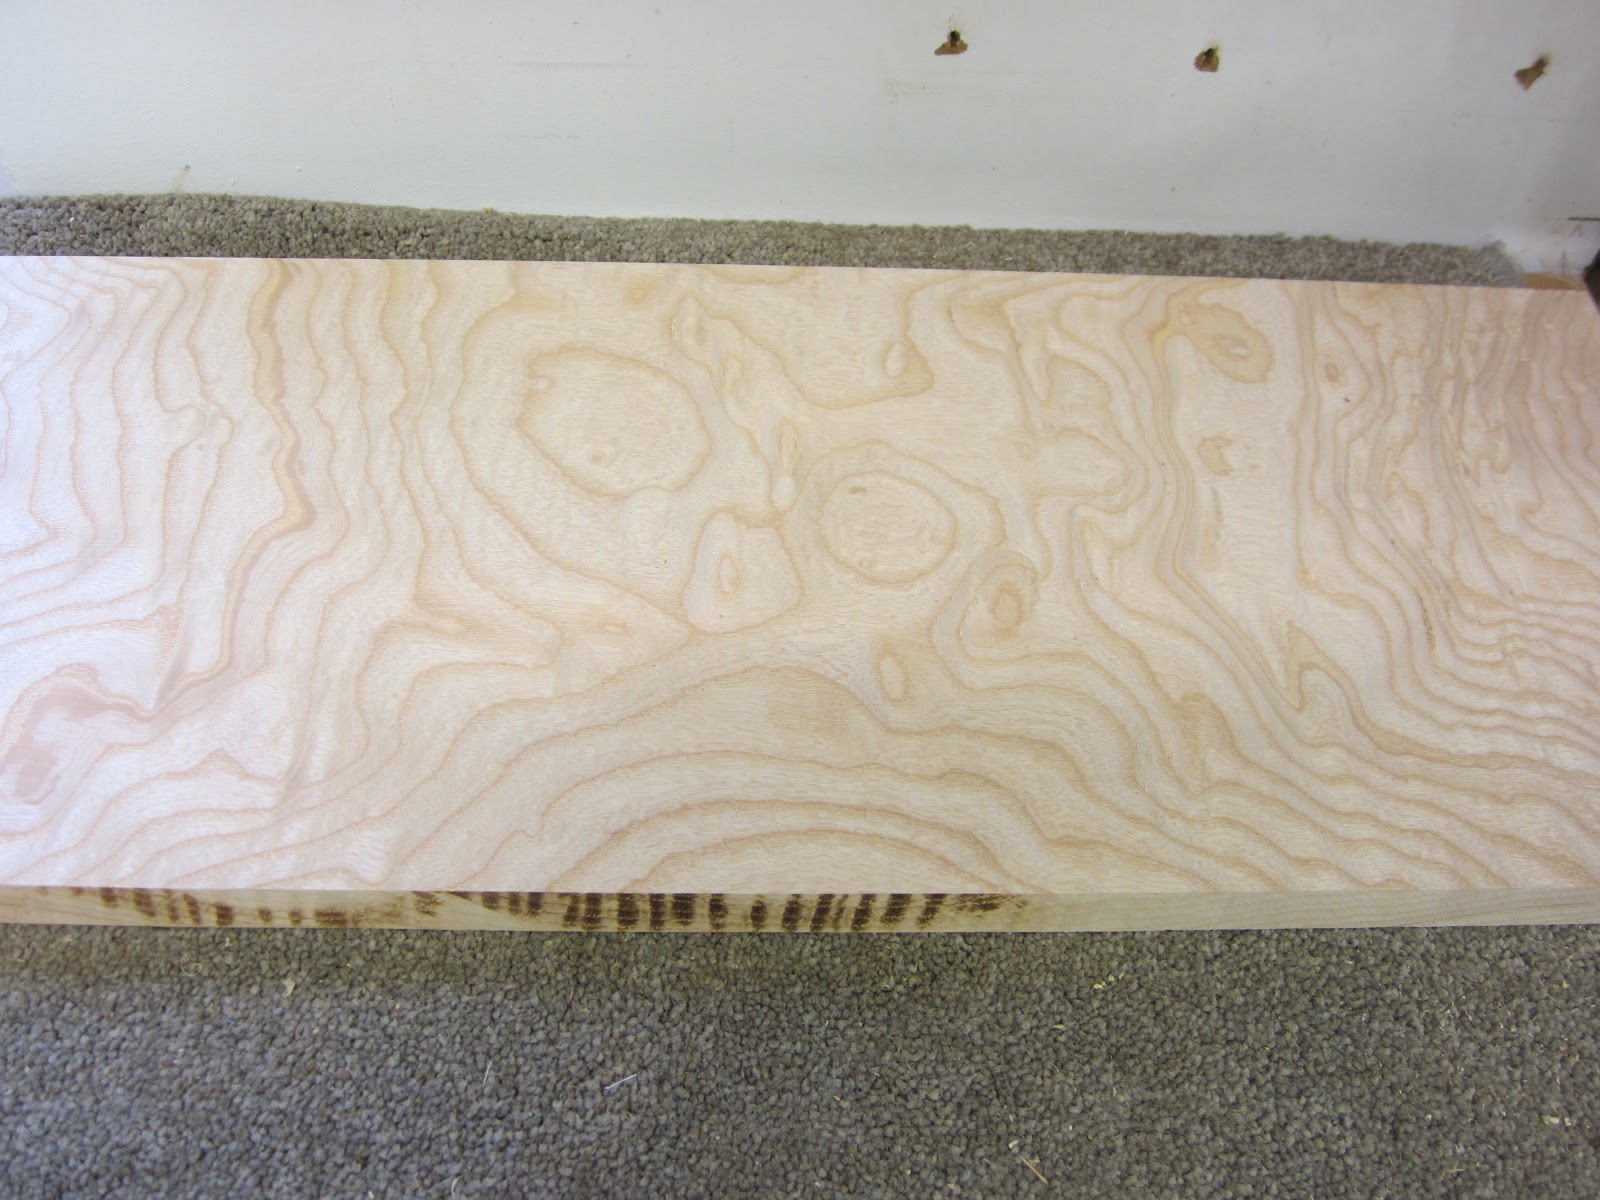
The door was to be curved which could be achieved in a few ways. Krenov typically coopered his curved doors but this works best for quarter sawn stock where the joins blend in with the vertical grain direction and would not have been suitable for this board. I seriously considered laminating the door from 2-3 mm strips cut on the band saw and gluing them on a former in the vacuum press. If I had intended making more similarly curved doors I would have gone this route, but as it was I decided to shape the door from a solid piece. The shot above shows the inside of the door with most of the waste removed on the table saw, making minute height adjustments to the blade on each cut.


I removed some of the waste on the outside of the door on the surface planer (jointer) but didn't go too far as by now the wood was getting thinner and there was a risk of serious damage. From that point it was over to hand planing using a curved sole plane for the inside and a flat smoother for the outside working down to the curved lines drawn on each end of the board.


Here is the result after scraping and initial sanding. I had considered leaving the door straight from the plane, Krenov style, but there was too much tearout on the swirling grain.


The carcass is from quarter sawn olive ash, the same board as my recently completed tool cabinet. Here I am dovetailing the sides with the boards taped together for speed. I'm still very pleased with my Bench Crafted Moxon vice, it's great for dovetailing.
Here is the carcass with the dovetails dry fitted, something I don't like doing as I normally make them a tight fit which only goes together once. After the hinges are marked and the curve traced on the top and bottom it needs to come apart for the work to be finished. I must also remember to rout out the groove for the back panel and interior fitments before reassembly.
Anyway that will happen in the New Year, so it just leaves me to wish all of you the very best for the New Year and happy woodworking!

Saturday 29 December 2012

Winner in Show!


No, unfortunately not me! This fine blanket chest won the apprentice category in the Texas furniture show.


The dovetails were cut using one of my magnetic guides. I certainly wouldn't have wanted to attempt cutting this many dovetails, in wood this thick, totally free hand.


The execution is very crisp, well done John!


Thursday 27 December 2012

Chisel Box, Andaman Padouk


I bought this set of Tasai chisels a little while ago and it's about time I made them a box.
The sides are laid out and marked with coloured dots, a very useful habit.


The chisels have a lovely balance and feel.


I'm cutting the dovetails for the box with a small hand made dovetail saw by Mitsukawa.
It's nice to cut dovetails without my magnetic guide once in a while just to show I still can!


The Andaman padouk has a wonderful orangey red colour.


James Krenov wrote that cutting dovetails in this hard brittle timber required extra care, and he was right! The fit had to push together by hand, if it needed a hammer it would split.


This is the little finger pull, carving is not my strong point so I kept it small.


The chisel housings were custom fitted on the table saw.
The even reveal was achieved on the router using my favourite Becksvoort router bit.


Monday 24 December 2012

Tool Cabinet Completed.


Here is my previous tool storage above the work bench, small, disorganised and a mess!


The new cabinet was dovetailed, the structural strength this provides is essential to support the French cleat method of mounting it on the wall.


Here is the new cabinet, much larger and more organised. It took 26 hours to make plus another three hours organising and fitting the interior.


The door is much narrower than the main carcass which leaves a gap behind when fully open. This allows the wall behind to be used for storing thin tools such as saws. In my work shop every inch of space needs to be used! I'll be writing an article for Furniture and Cabinet Making magazine which should appear within the next few months.


This is the cabinet closed, the main carcass is quarter sawn olive ash and the panels are book matched rippled English walnut. All the wood came from Alan Peters workshop.
Below is a close up of the wonderful walnut.


Saturday 22 December 2012

What a Waste!


These pieces of curly birch came from my latest delivery of fire wood, can you believe someone chopped up a log this nice? I've saved these pieces which should manage some small box lids when they have dried.


Just look at the movement in that grain.


On a happier note I visited Bob at Timberline and bought some more of that wonderful Andaman Padouk which came from the late Alan Peters work shop. James Krenov waxed lyrical over this stuff and I'm very much looking forward to making a box or wall cabinet from it (soon I hope!)


I also  bought this board of Cuban mahogany, yes it was one board all 15' of it! I had to chop it into 3 to get it into my estate car.
It had been cut 1/2" thick over its whole length and was bang on quarter sawn. The middle third of the board is the heart with plenty of cracks but the outer part of both sides is heavily rippled along the full length of the board. This is rare stuff and will make wonderful panels, perhaps with the Andaman padouk.


Thursday 20 December 2012

Best Tape Measure?


An order arrived from Dictum Tools in Germany today (their catalogue is well worth getting hold of) and included this little tape measure. It wasn't cheap but sounded well made with some neat ideas. The first thing I like is the locking mechanism which locks when you release the thumb press and is more accurate. I also prefer routers with this feature although I don't own one!


Another nice touch is the protruding hook under the head which allows a board to be accurately measured and then locked off for the reading to be taken at your leisure. It helps that there is no play whatsoever in the main hook on the front of the tape.


For taking inside measurements the back tape can be rolled down which adds exactly 10 cm to the scale and to assist you the inside scale had figures in red, see below.
This will be my tape of choice in the workshop from now on, made by Hultafors in Sweden, although I did notice the scale was made by Fisco in the UK.


Tuesday 18 December 2012

Brass Hammer Heads


When I made a batch of chisel hammers recently I asked if anyone knew of an easier way to shape the heads and someone did, by CNC.  I ordered a batch of 100 and they arrived today, I'm not going to miss all that shaping!

The finish was good enough to use but I'll still probably buff them to a shine.


Below is the door for my wall mounted tool chest going through my new wide belt sander. It was a bit wider than the 18" capacity so it had to be reversed, it wasn't perfectly level so I need to adjust it, but it was a pleasure to see no hint of burning.


I'm writing an article on the tool chest for F&C magazine so I can't show too much on the making. The shot below shows the lid being cut off on the table saw, nerve racking stuff especially after so much work!
All went well.

Sunday 16 December 2012

Barr Quarton Chisels


I've started making a wall mounted tool cabinet with plenty of dovetails, more of that later in the week.


I'm using my fine set of Barr Quarton chisels which are lovely to use with a really good heft, ideal for cleaning out larger dovetails.


Although they came to me razor sharp there were still a few tweaks needed. The first was to cut down the protruding handle top and mushroom the wood over in the Japanese style.


The ash handles came lightly oiled which is not enough protection for the open grained wood. In a short time the grain would start to fill with dirt and look unsightly, so I gave them three coats of Osmo Hard Wax Oil. The matt version suits the ash well and is keeping with the style of the chisels.

The last tweak was to refine the sides of of the 1/4" chisel so that they didn't damage the corners of the dovetail sockets. I did this on the rounded end of my belt sander/linisher, great care must be taken not to go too far as this will reduce the width of the chisel tip. The chisel at the top shows the sides before attention, I also took care to make the work neat, these chisels are not cheap!!

Friday 14 December 2012

More Home Made Planes!


These are pictures of some beatifully made planes by Alexander Voss from Germany. He is starting a luthier business in January and has started a blog http://www.startingvossguitars.blogspot.co.uk/ which will document his progress. At the moment there are only 3 posts but have a look at the outside of his new workshop at the bottom of his blog, to die for!


A nicely shaped smoother with a very fine mouth, just as it should be.