Monday, 6 August 2012
Norris Plane Restoration
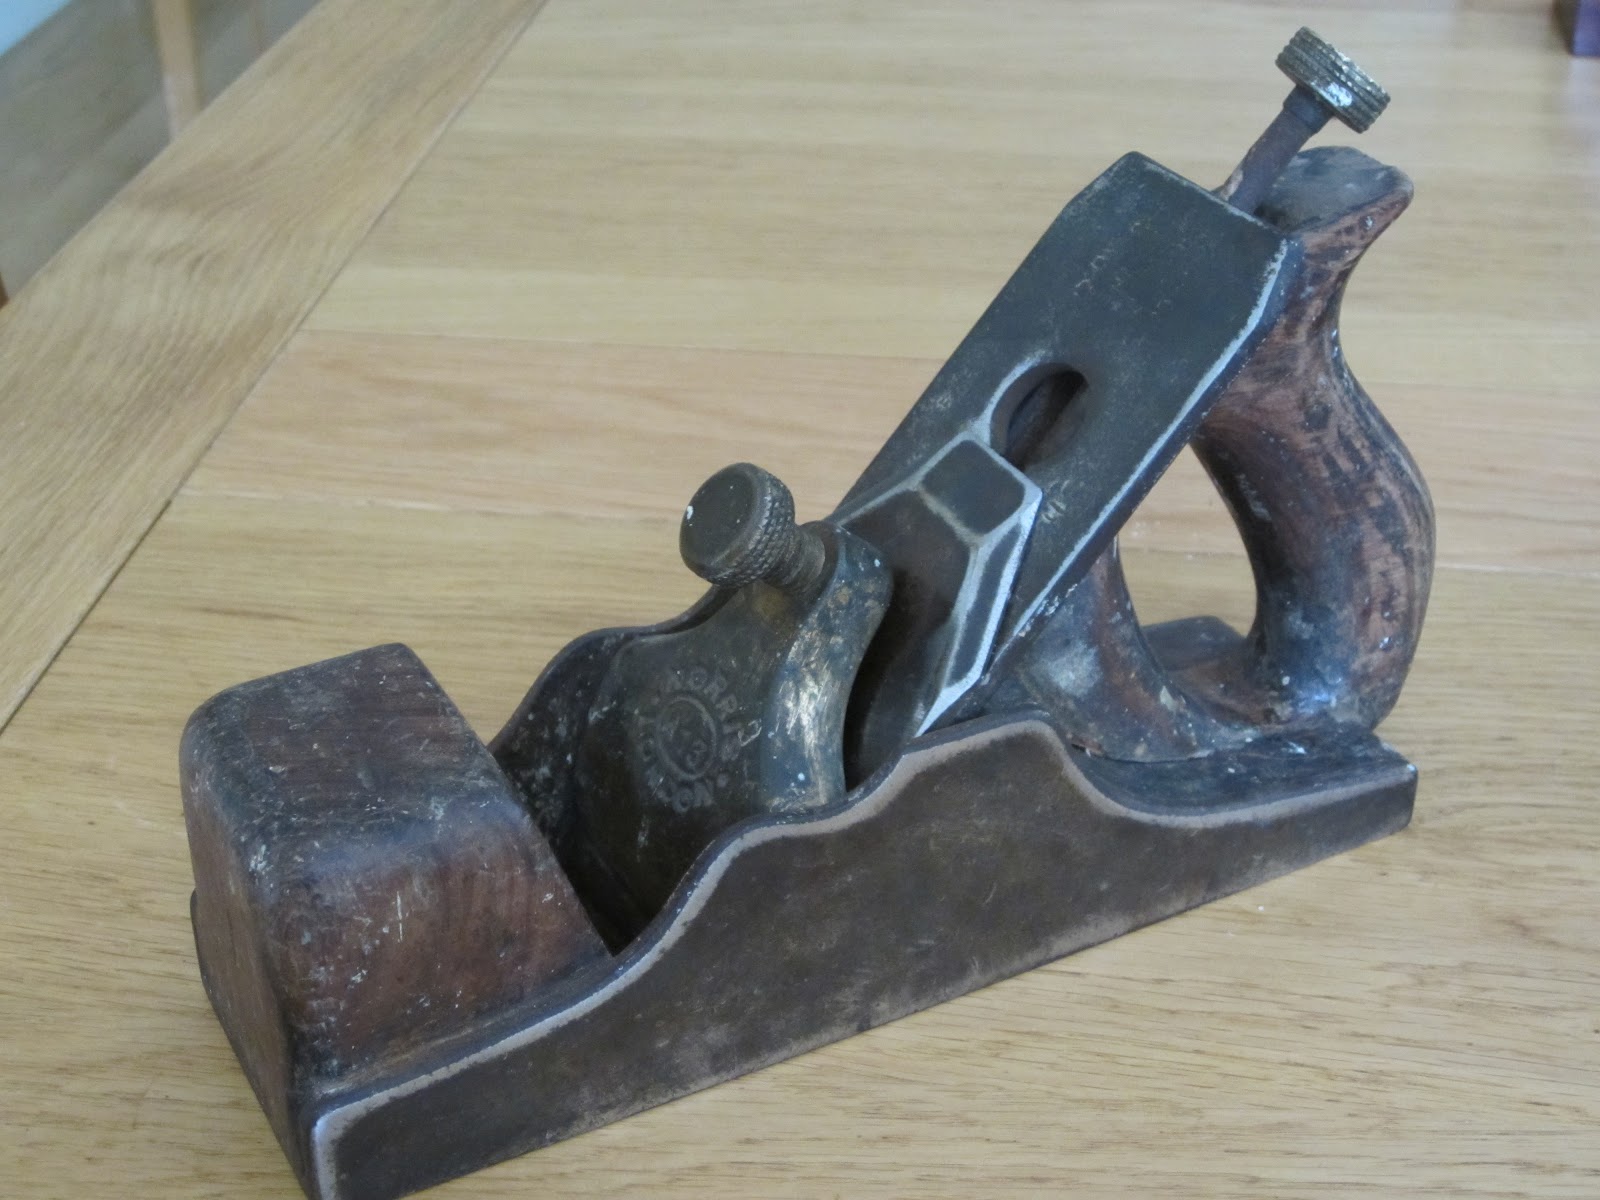
So here it is in all its glory my Norris A13! I've never seen one of these in the flesh before but it's in a sorry state.
The handle had a crack which a previous owner had glued and added these side cheeks for extra support. They were prised off with a sharp chisel and the old glue scraped off.
The adjuster was bent and a crack was evident in the side cheek, a typical area to get damaged. the adjuster ran smoothly up and down but need some releasing oil to get the sideways movement going.
I straightened the bent adjuster with careful positioning on the corner of an anvil, nerve racking stuff!
The crack at the top uncovered and old repair and a scarfed in piece of mahogany. The colour match was surprisingly good with the rosewood so I cleaned it up and re-glued it with epoxy resin.
You can also see the full extent of the bent adjuster here before it was straightened.
I cleaned the brass up with 400 grit wet and dry dipped in mineral spirit and used the soft brass brush to clean all the gunk out of the heavy name stamp.
The crack was glued with epoxy and clamped leaving it proud so that it could be sanded flush. I also cleaned up the tarnished metal with 400 grit and mineral spirit, the metal was in pretty good shape (thank god something was!)
I sanded everything flush and smooth working from 120 g through 180 and 240g.
I then applied a rosewood stain all over which returned the colour to a more typical shade of an 80 or 90 year old plane. I darkened the rosewood stain for the rear handle with some black oil stain to even up the colour.
I applied gun blue to the metal sides to dull down the sanding and more particularly the edges which had been linished by a previous owner. I also used the gun blue to tone down the lever cap.
The gun blue makes things go very dark so I adjusted as necessary with the wet and dry 400 g and mineral spirit. The result was very pleasing giving a nice 'old' patination of both metals.
The brass brush had over cleaned the lettering so I filled it with the black oil pigment and wiped off the excess.
I adjusted the colour until the lever cap looked natural.
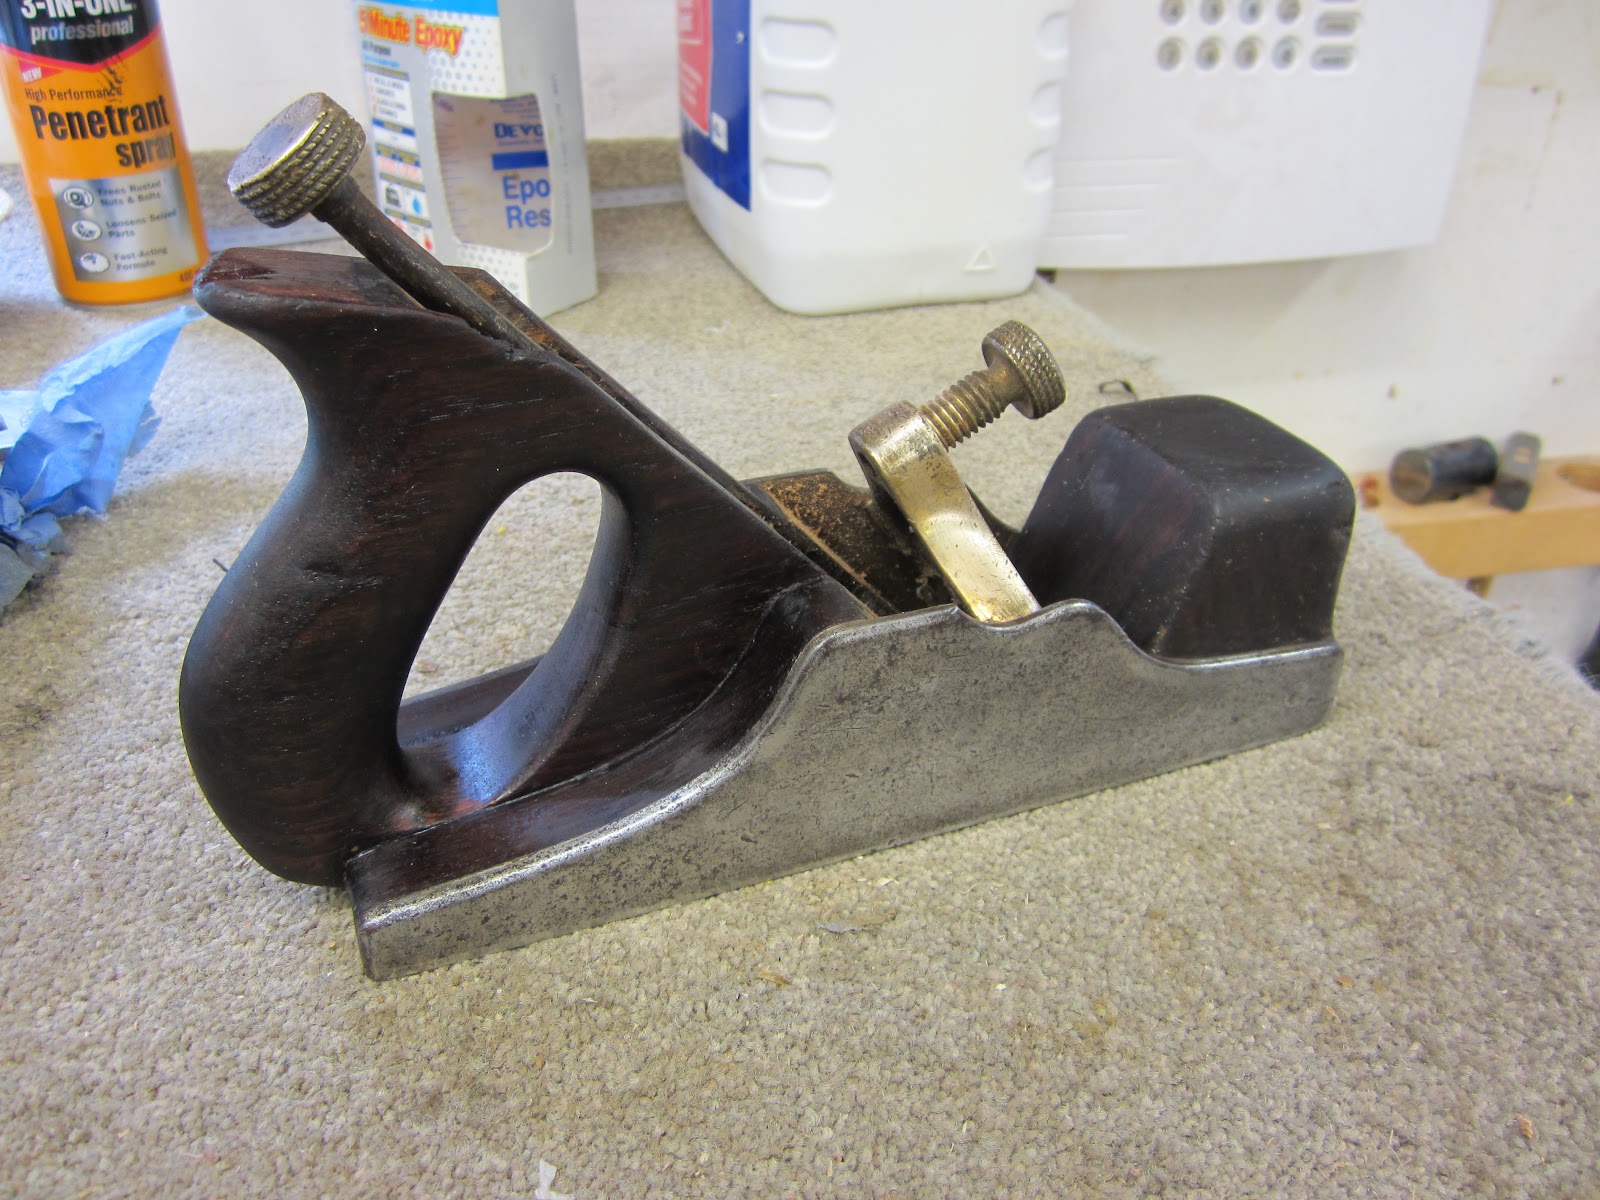
The seal for the wood was 4 coats of heavy cut shellac which was then cut back with Abralon 600 grit to a matt smooth finish. I then applied a coat of hard carnauba wax to lend some added protection and give a soft sheen to the wood as is typically displayed on nicely worn antique handles.
The rosewood was a pleasant surprise and the cracks were almost hidden.
The last step was to treat the plane to a replacement iron and chip breaker from another Norris plane, making sure it was correct for the period as indicated by the 1922 date on the adjuster lever. This restoration had gone well and I was pleased with the result. It took five hours in total plus the £300 to buy the plane in the first place. Time will tell if it was a good investment although I don't intend parting with this one for a long time yet.
Saturday, 4 August 2012
Tool Auction
I visited the David Stanley auction on Friday, here are the 1,000 lots laid out for viewing. This wasn't the international auction but I prefer these as there are more bargains and you can take the tools away with you, saving postage, packing and credit card charges.
They had plenty of tools chests and this was the nicest.
Bill and Sarah Carter had a small stand as usual with a fine selection of Bills lovely planes for sale.
I couldn't resist (as usual!) and bought this large mitre plane in yew.
Here's my haul from the auction, a few need some restoration but I enjoy that and hopefully don't buy any I can't cope with.
The bargain of the day was this pack of 6 cast steel blades which I picked up for £6 inc the premium. Five of them were parallel blades which are changing hands for £20 each on E Bay.
This is a rare plane, a Norris A13. It is in a sorry state with a cracked handle, bent adjuster, belt sanded edges, non original blade and covered in muck and paint. I bought this at a knock down price from one of the stall holders and will hopefully be bringing it back to its former glory tomorrow, watch this space!
Thursday, 2 August 2012
Tool Boxes
I love making boxes and have a particular fondness for tool boxes, not the large 'takes two people to carry type', but the handily sized bench top versions.
I found this on recently in an antique shop, it is very nicely proportioned and is hand dovetailed on all corners. It's made from Elm and dates from the late 19 C.
It has nice heavy brass ware which is probably original. It measures 19 1/2" w x 11 1/2" d x 8" h
Jameel Abraham made a strikingly similar box which can be seen here. http://benchcrafted.blogspot.co.uk/2010/10/wia-birds-eye-maple-box.html
Here is another box which I've had for a while, probably from the 1960's again with classical proportions and hand cut dovetails on the drawers.
The top set of drawers are dummies, and I intend to make a version of this. 20" x 9" d x 11 1/4" h.
Monday, 30 July 2012
Bench Crafted Moxon Vice
| Here are the parts for the Moxon vice, simple, sturdy and very well made. The suede leather is to line the jaws. |
The first thing I did was to remove the vice which simply unscrewed from leg. I also removed the cross bar and dispensed with the sliding dead man. This would allow me to sit at the bench and tuck my legs underneath, making close chisel work much more comfortable. I have also moved the bench top so that the overhang is on the right hand side, which will prevent the left hand leg from getting in the way.
The apron is 4" deep and the top is 1 3/4" which was perfect for holes to go in the middle of the 5" jaws. the holes for the rods were done on the drill press, but the holes through the apron had to be eye balled as the top was already assembled. You can see a rod positioned in the first hole as I drilled the second. I made sure the jaw protruded 2 mm as it will drop slightly once installed and it's much easier to plane the jaw level rather than the whole top!
Here is a shot from under the bench showing how the nuts just miss the underside of the1 3/4" thick top.
The nuts on the front side had to be recessed into apron. The nut could be captured with a square hole but it is neater and stronger to cut a matching hexagon.
Once the vice was installed hand planing it level was done quickly.
One of the problems with twin screw vices is that they wrack vertically. Obviously the nearer you get the screws to the top the better this will be, so with the holes only 2 1/2" down, this vice is pretty good. However as I often use very small pieces I also tapered the jaw by 2 mm over the 5" depth, which meant the jaws nipped up at the top first, just what I was after. You can see the slight taper in the picture above.
With a quick spray of dry PTFE lubricant (as recommended) the wheels ran very sweetly and worked just as expected. The depth of opening is limited by the capacity of the 8" screws, although I managed a 3" maximum which is more than enough for my cabinet making. After playing around with the wheels I actually reduced the capacity by winding in the threads a bit more under the top. This prevented the protruding screws from digging into my palms as I spun the wheels.
All that was left was to glue on the suede, round over the edges, fill the old holes and apply a coat of finish.
I'll be bringing this bench to the European woodworking show as well as Yandles, both in September.
I think we are going to become good friends!
Friday, 27 July 2012
Birthday Tools
It was my birthday yesterday, 52 years old. Or as my wife quipped only 8 more years and you'll be 60!
I don't feel 52, I still have the same energy and drive as when I was 30.
Anyway it gave me an excuse to invest (that's a good word) in some new hand tools. I've had a 7" Incra square for a year or so and it's an excellent tool, better balanced than an engineers square and just as accurate. It's also guaranteed to stay square if it's dropped, but I haven't put that to the test yet. I bought (sorry invested in) the 5" version which doesn't sound much different, but it's about half the weight and much more handy for smaller work.
One very useful feature is a lip on the main stock which helps to support the square against an edge. I don't use my engineers squares any more.
It comes in a very nicely fitted box, although this has already been added to my box pile on a top shelf.
I also ordered a Gremercy holdfast which is about as simple a tool as you can get. It fits a 3/4" hole and is secured with a firm rap, it works very well.
It is shown here with a Veritas hold down and you can see it has a much better reach as well as depth. It also doesn't have the annoying habit of throwing off the nut when you want a nice firm hold. I think the Veritas will be on E Bay shortly.
I love nicely made tools and Starrett do just that. These didn't cost that much and my cheap Chinese ones have been binned, I'm learning!
The 3/4" augur bit is for holes in a work bench I'm just about to build, which this space.
Tuesday, 24 July 2012
Workshop storage
While I was away in Holland I bought a large tool cabinet on E Bay which I picked up yesterday. Even though I had the measurements it still surprised me how big it was in real life. These are the cabinets used in car workshops and I was surprised to learn that each mechanic had to buy their own. The young man who sold it to me was emigrating to Australia and it was obviously his pride and joy, it wasn't cheap but it was a third of the new price.
I was fed up of having my tools spread out all over the workshop, in shelves, boxes, drawers, cupboards etc. This tool box is big enough to hold everything in one place with each drawer labelled with its contents. As I started to fill the cabinet it became obvious how useful this was going to be, I should have done this years ago!
Thursday, 19 July 2012
Netherlands
At last something woody! This guitar shop was in the capitol of Zeeland, Middleberg.
The shop declared itself as having hand made and antique guitars and they must have been worth a fair bit as I was followed closely around. I don't know too much about musical instruments but I did see some incredibly fine grained spruce it these guitars.
The shop assistant didn't seem to keen on me taking photos see that's all I could manage before being ushered out!
No trip to Holland would be complete without a shot of one of these. There were surprisingly few around especially considering the force of the wind off the North Sea, in fact there seem to be far more giant wind turbines, a sign of the times.
This country is very clean indeed and I've never seen so many perfectly clipped hedges and neat gardens. The style of the houses is also distinctive and even the newer ones were sympathetic in style, take note England.
Many of the houses are very small although they seem to give the impression of being larger, maybe it's the large windows and bold roof lines. The older villages had a church at the centre, again immaculately tended, with a circle of old cottages and shops going right round, very picturesque.
We'll be back in the UK tomorrow, it's been a great break but I'm looking forward to seeing my workshop again, England isn't all bad!
Subscribe to:
Comments (Atom)