I've tried various techniques for making bridle joints (open mortice and tenon), the band saw, the router table and by hand. But this method I've found to be the most accurate by using the table saw. You can buy tenoning jigs which ride in the mitre slot but the one I tried was so poorly made it was a waste of time and money. The picture above shows a piece being clamped vertically to the Flip Stop on my cross cut sled, it requires removal of the guard and while it may look dangerous, it allows you to stand well out of the firing line when the cuts are being made.
This shows the 7 pieces that make up the panelled lid on the box, everything can be dry fitted and marked with dots prior to glue up. I didn't reply on the table saw to cut right to the base line, instead I used a cutting gauge and sharp chisels to make the final cuts for a perfect gap free result.
Another technique to ensure the centre rail is perfectly aligned with the end rails is to start with the three pieces exactly the same length and make the same shoulder mark with the cutting gauge. The over long tenon for the centre piece can then be trimmed back to length and you'll know that all three pieces will snug up perfectly.
Bridle joints require a multitude of clamps to make everything is gap free.
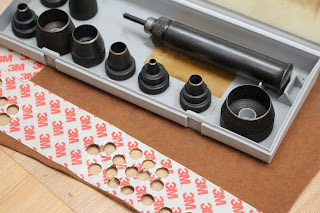
I like to use leather bumpers on the base of my boxes to reduce movement and stops scratches. Shop bought ones tend to be in felt and are too thick as well as expensive, so I simply choose some leather, apply double sided tape and use whatever sized punch I please.
A nice discrete finish to suit the colour and size of the box.


No comments:
Post a Comment